Caelum is deployed via a single universal ISO image, which installs identically on VMware / vSphere, Proxmox VE, Hyper-V, KVM/libvirt and bare-metal.
For the installation media, the safe recommended path is BIOS / Legacy (on Hyper-V: a Generation 1 VM). Once installed, the appliance works either way, in BIOS as well as in UEFI; its disk is hybrid.
Installation happens in two stages:
- System installation (text-based wizard at ISO boot) — writes the Caelum OS to the target disk. ~3 minutes.
- Initial configuration (web setup wizard
https://<ip>/setup) — administrator account, network, storage pool, Active Directory, telemetry.
Prerequisites#
| Resource | Minimum | Recommended |
|---|---|---|
| vCPU | 2 | 4 |
| RAM | 4 GB | 8 GB |
| OS disk | 16 GB, dedicated | 24 GB SSD |
| Data disk(s) | 1 separate disk ≥ 10 GB (for the pool) | as needed |
| Network adapter | 1 (VMXNET3 / virtio recommended) | — |
| Firmware (to boot the ISO) | BIOS / Legacy | BIOS / Legacy |
Important points:
- The OS and the data are on separate disks. Plan for a disk dedicated to the OS (≥ 16 GB) and at least one additional disk for the storage pool. The data disk can be added before or after installation.
- Preferably use a VM with a single OS disk at install time to avoid any ambiguity about the target disk, then add the data disk(s) afterward.
- Boot firmware for the ISO: preferably use BIOS / Legacy for the installation media (safe recommended path). UEFI booting of the ISO is not guaranteed on all hypervisors: if in doubt, stay on BIOS / Legacy. Once installed, the appliance works either way, in BIOS as well as in UEFI; its disk is hybrid. On Hyper-V, create a Generation 1 VM for installation.
- Network: the appliance boots in DHCP. A static IP is set in the web
wizard (or from the console via
sudo galilo-set-ip):
# Console — set a static IP before the web wizard
sudo galilo-set-ip
- The HTTPS certificate is self-signed: accept the browser warning on first connection.
Creating the VM for your platform#
The same ISO installs everywhere. Only the VM creation differs. In every
case: mount the ISO caelum-<version>.iso as a CD/DVD drive, boot from it,
then follow Part A.
VMware vSphere / ESXi#
- New VM → Custom, guest Linux / Debian 12 (64-bit).
- Firmware BIOS recommended for the installation media (safe path).
- Disk 1 (OS): 24 GB (Thin). Disk 2 (data): ≥ 10 GB (100 GB here). VMware Paravirtual (pvscsi) controller.
- VMXNET3 network adapter.
- Datastore: mount the ISO from a datastore (e.g. Datastore ISO → CD/DVD → Datastore ISO File), with Connect at power on checked.
- Boot: CD/DVD first for installation, then the OS disk.
Proxmox VE#
- Create VM, q35, BIOS SeaBIOS recommended for the media (safe path).
- VirtIO Block disks: OS 24 GB + data ≥ 10 GB.
- VirtIO (paravirtualized) network.
- CD/DVD: ISO
caelum-…iso; boot order CD then OS disk.
Microsoft Hyper-V#
- Generation 1 VM (BIOS) for installation (safe recommended path for the media).
- VHDX disks: OS 24 GB + data ≥ 10 GB.
- DVD Drive: ISO image; place it before the disk in the boot order.
KVM / libvirt (virt-manager)#
virt-installor virt-manager, firmware BIOS (SeaBIOS) recommended for the media.- virtio disks: OS 24 GB + data ≥ 10 GB; virtio network.
- CD-ROM = the ISO; boot CD then disk.
Bare-metal (physical server)#
- Write the ISO to a USB stick (Linux/macOS) or with Rufus/balenaEtcher (Windows):
# Linux/macOS — write the ISO to a USB stick (double-check the /dev/sdX device)
sudo dd if=caelum-<version>.iso of=/dev/sdX bs=4M status=progress
- Boot from the stick in Legacy/BIOS (safe recommended path for the media). Plan for a disk dedicated to the OS (≥ 16 GB) and at least one data disk for the pool.
Target disk: to avoid any ambiguity about the disk letter (sda/sdb depending on enumeration), the simplest approach is to attach only the OS disk at install time, then add the data disk(s) before the Storage step of the web wizard (Rescan disks button).
Part A — System installation (ISO wizard)#
Boot the machine from the Caelum ISO. The installation wizard starts automatically.
A.1 — Welcome screen#
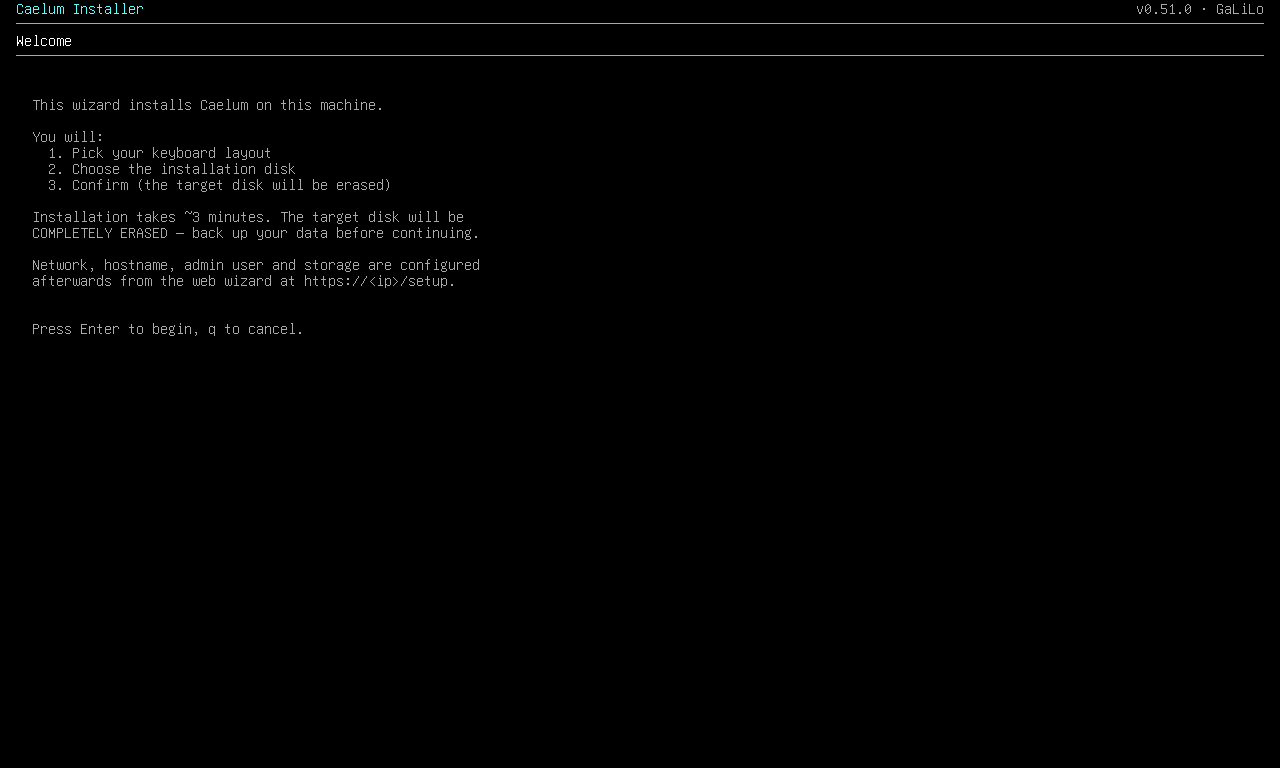
The wizard summarizes the 3 steps and warns that the target disk will be entirely erased. Network, hostname, admin account and storage are configured afterward, from the web wizard.
➡️ Press Enter to begin.
A.2 — Keyboard layout (step 1/3)#
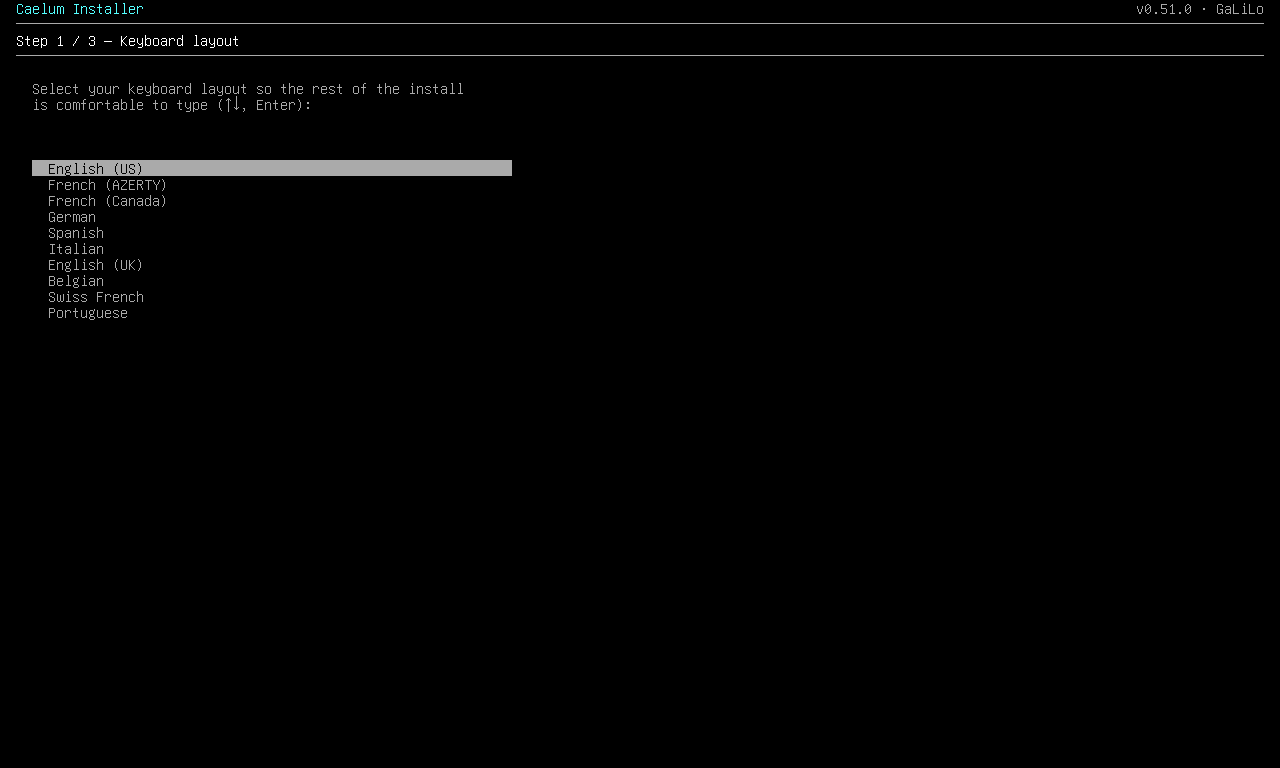
Select your keyboard layout (arrows ↑↓, Enter) so that the rest is comfortable to type. 10 layouts available (US, AZERTY, QWERTZ, etc.).
A.3 — Target disk (step 2/3)#
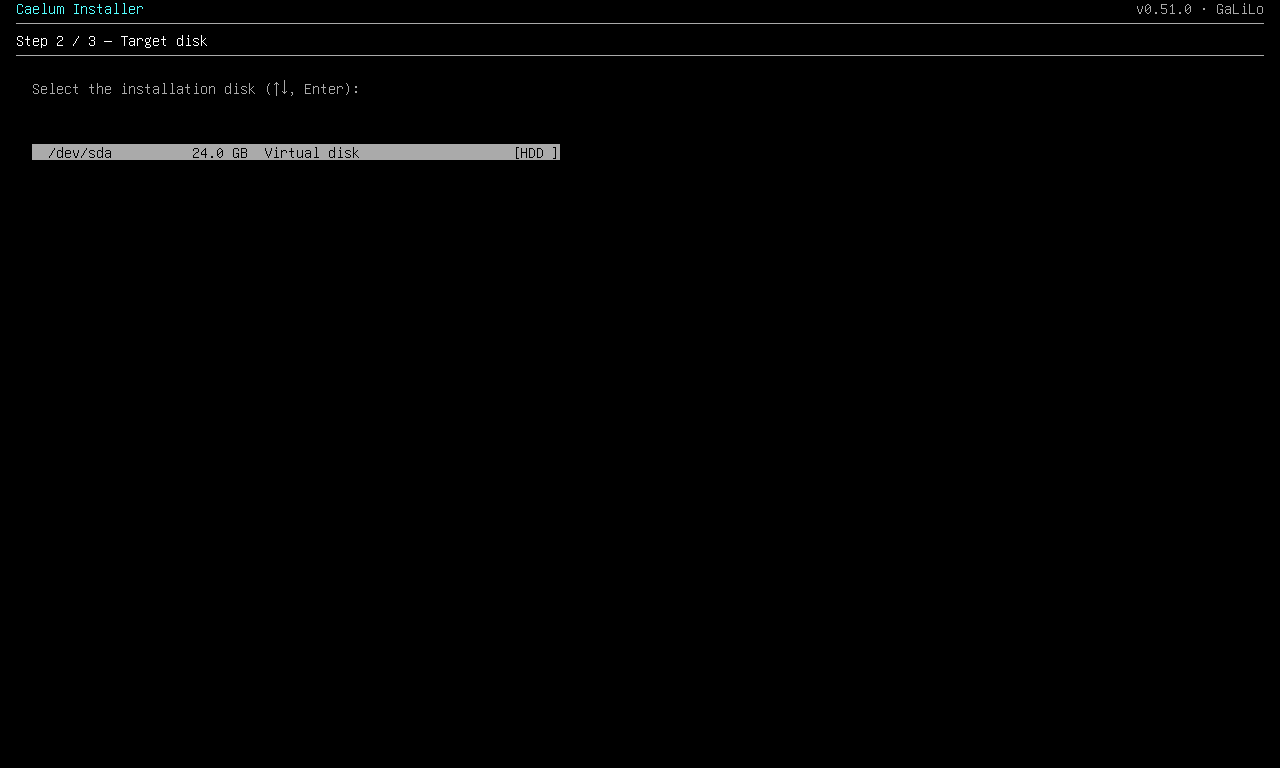
Select the installation disk. The OS will entirely overwrite this disk. If several disks are present, choose the disk that the firmware boots from (usually the dedicated OS disk).
A.4 — Confirmation (step 3/3)#
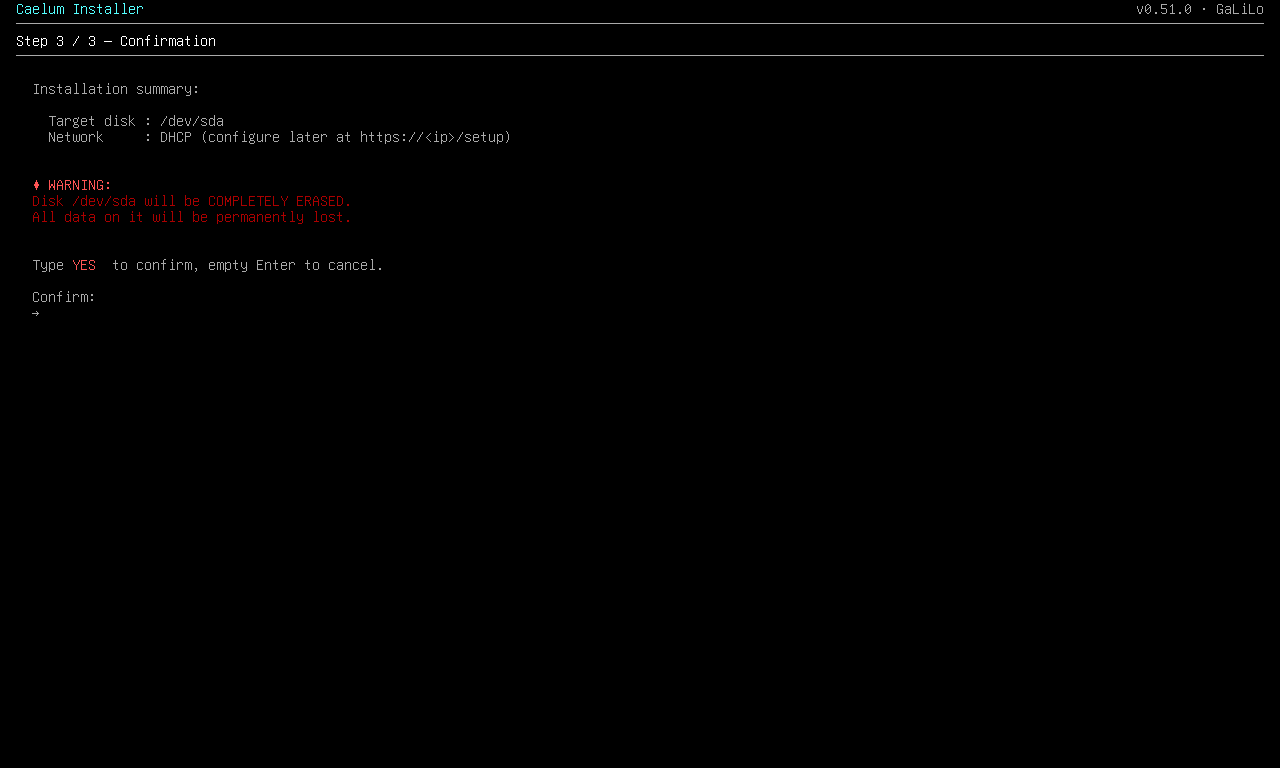
Review the summary. To confirm erasure, type YES then Enter (an empty
Enter = cancel).
A.5 — Installation#
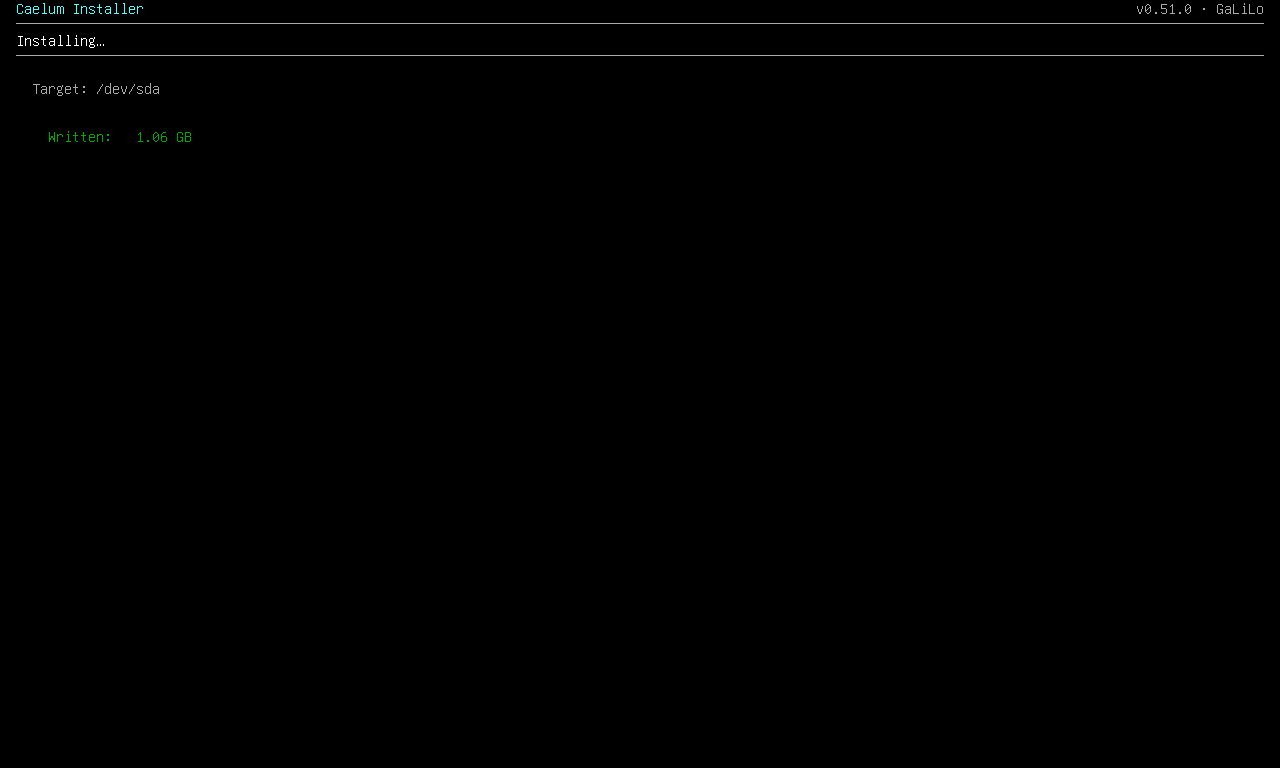
The disk image is written to the target with a progress bar (~16 GB, 1 to 3 minutes).
A.6 — Done#
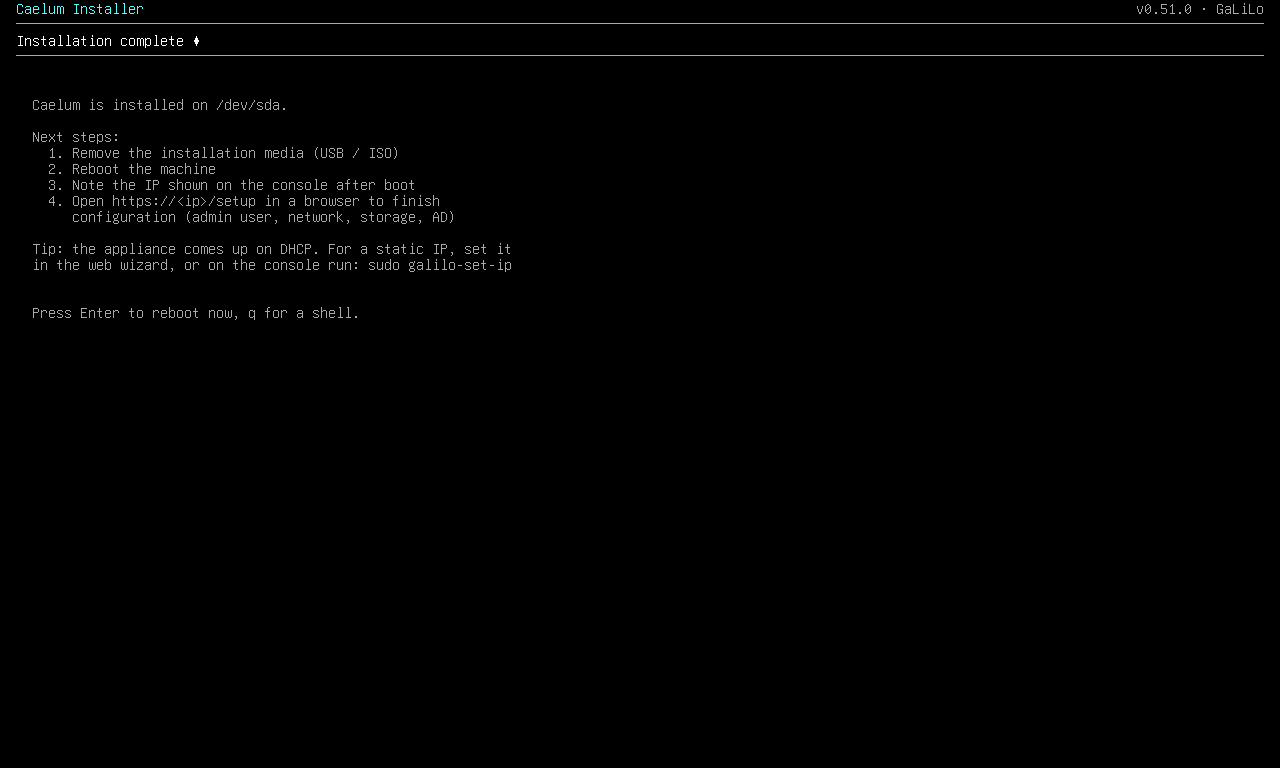
Once the "Installation complete" screen is displayed:
- Remove the installation media (eject the ISO on the hypervisor side).
- Restart the machine.
A.7 — First boot#
On first boot, the appliance configures itself (key generation, service
startup) and displays a console banner with its IP and the
configuration URL. Note the IP, then open https://<ip>/setup in a browser.
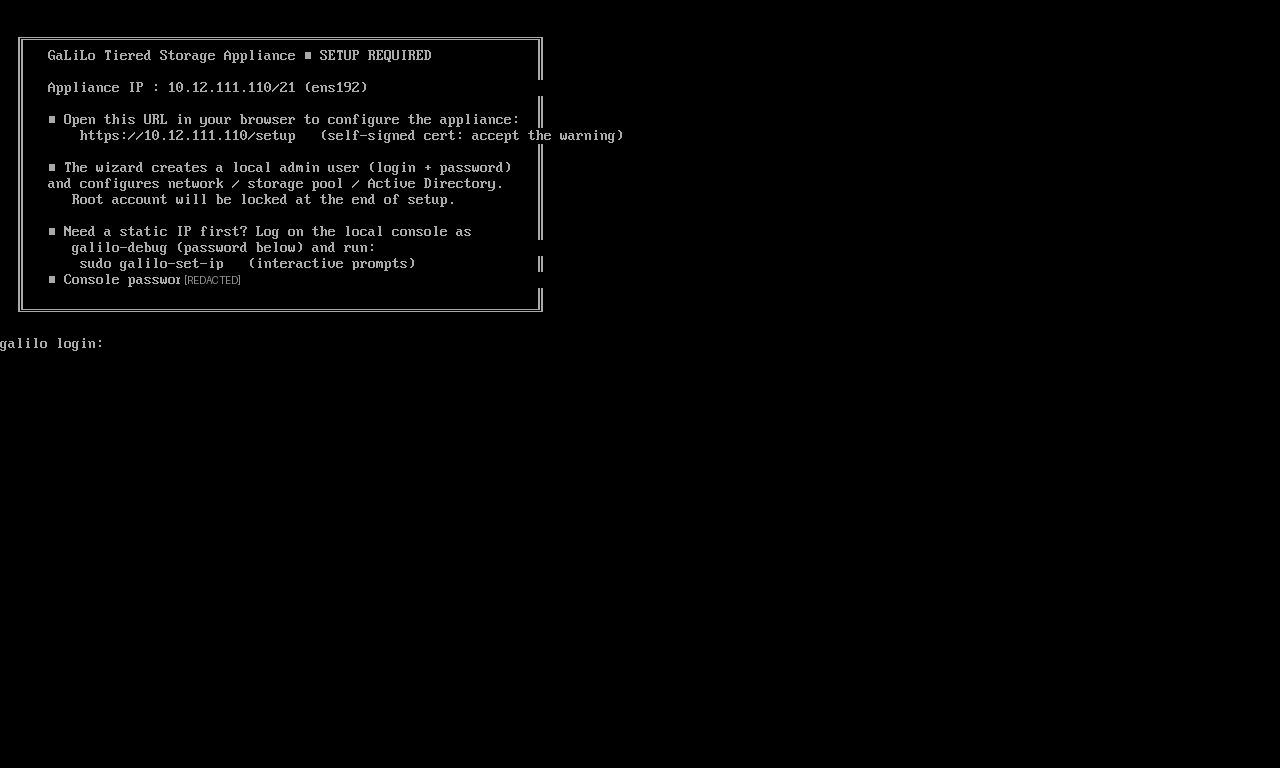
Need a static IP before the web setup? Log in to the console as
galilo-debug (password shown on the banner) and run
sudo galilo-set-ip.
Part B — Initial configuration (web wizard)#
Open https://<ip>/setup and accept the self-signed certificate warning.
The wizard has 7 steps.
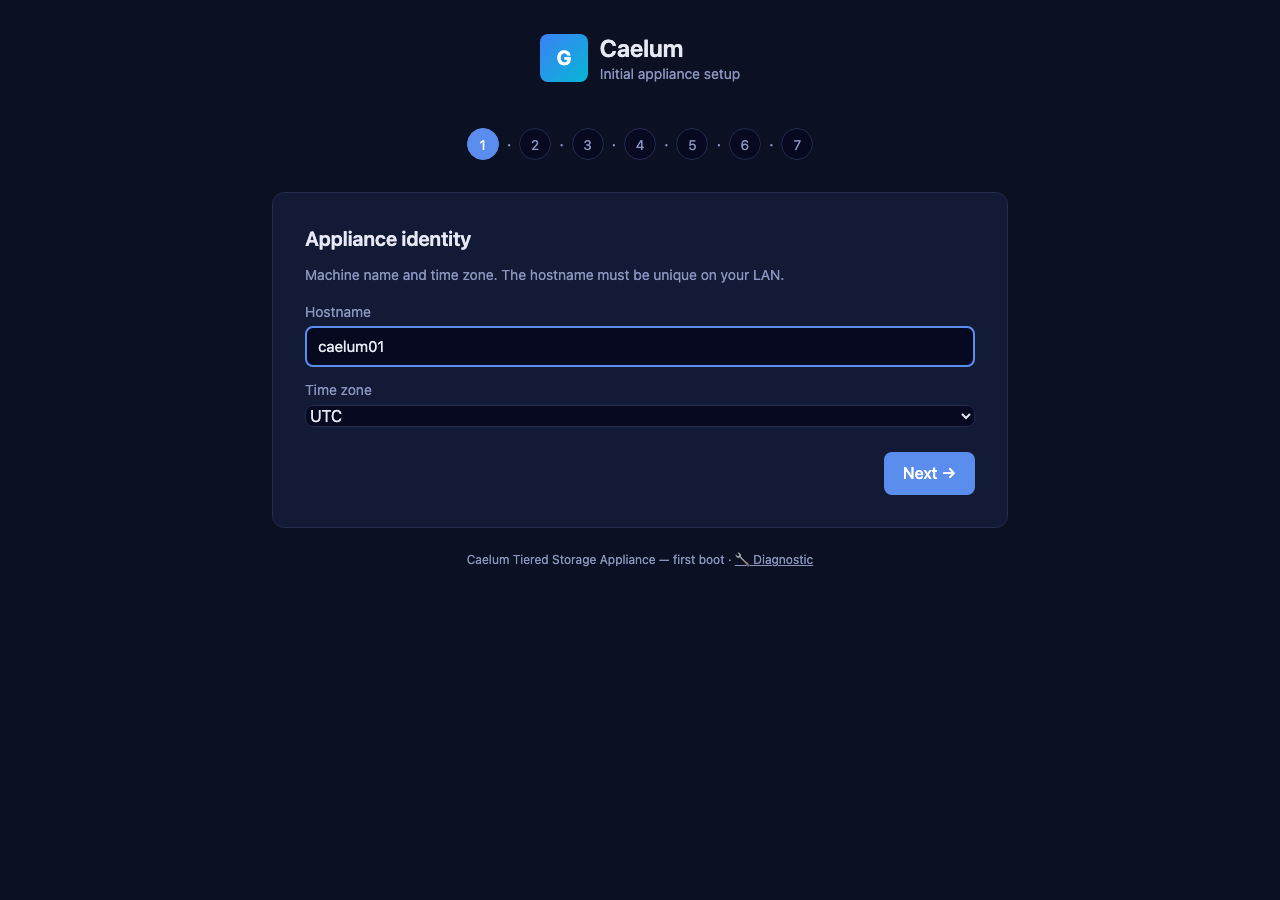
B.1 — Appliance name (step 1/7)#
Set the hostname (e.g. caelum) and the time zone.
B.2 — Network (step 2/7)#
Keep DHCP or switch to a static IP. For a static IP, provide the interface, the address in CIDR notation, the gateway and the DNS servers.
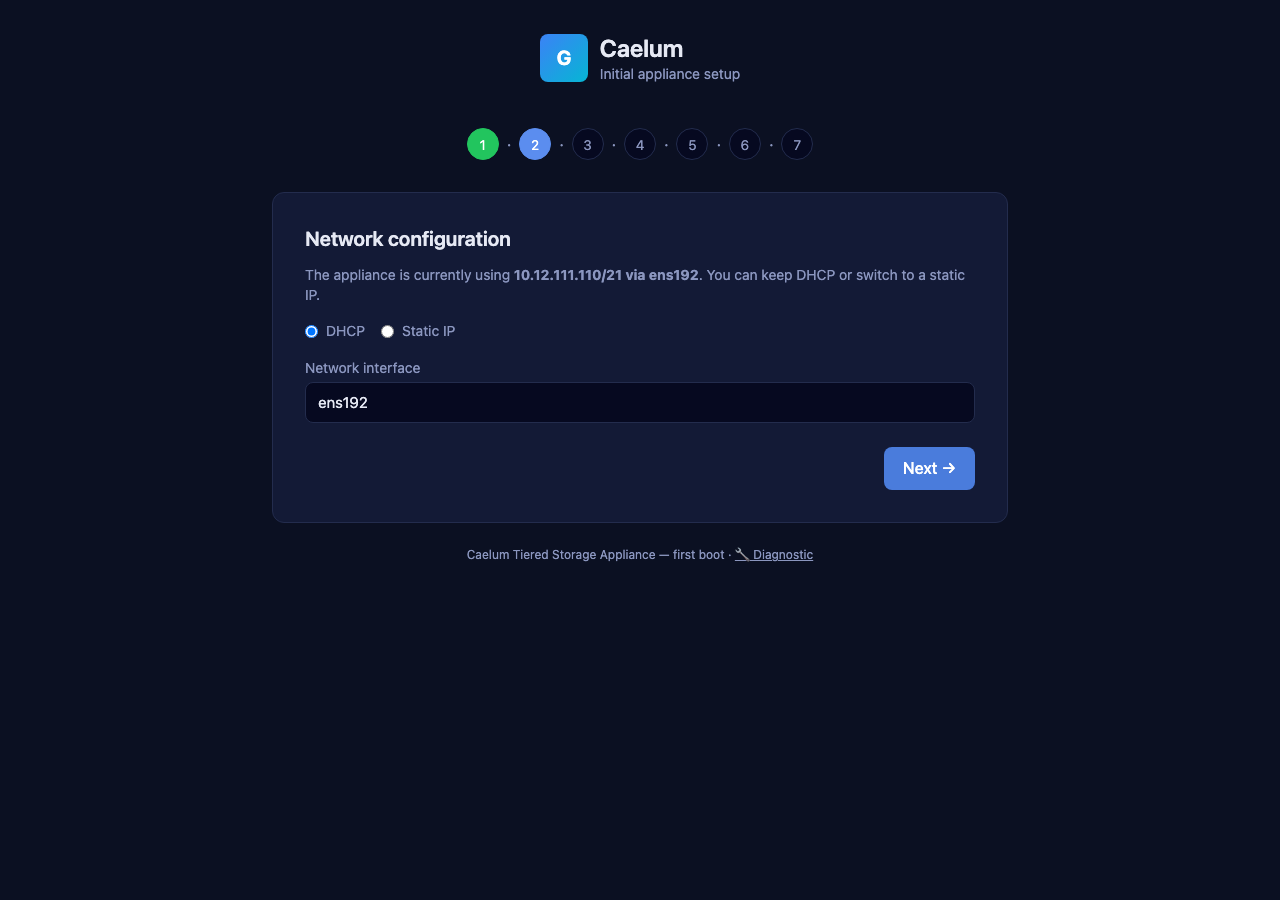
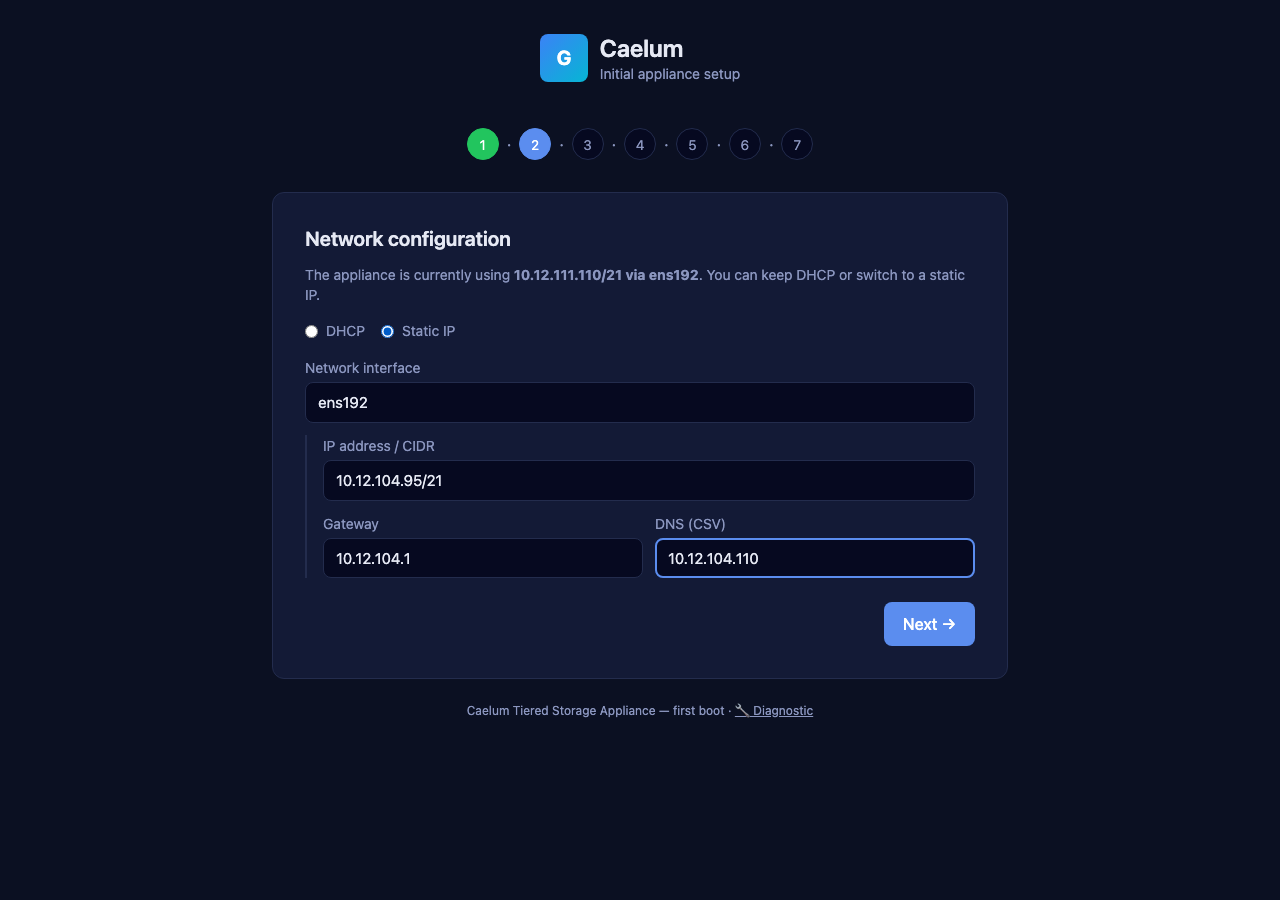
If you change the IP, the wizard automatically redirects to the new
address (https://<new-ip>/setup). Reconnect there if your browser does not
follow.
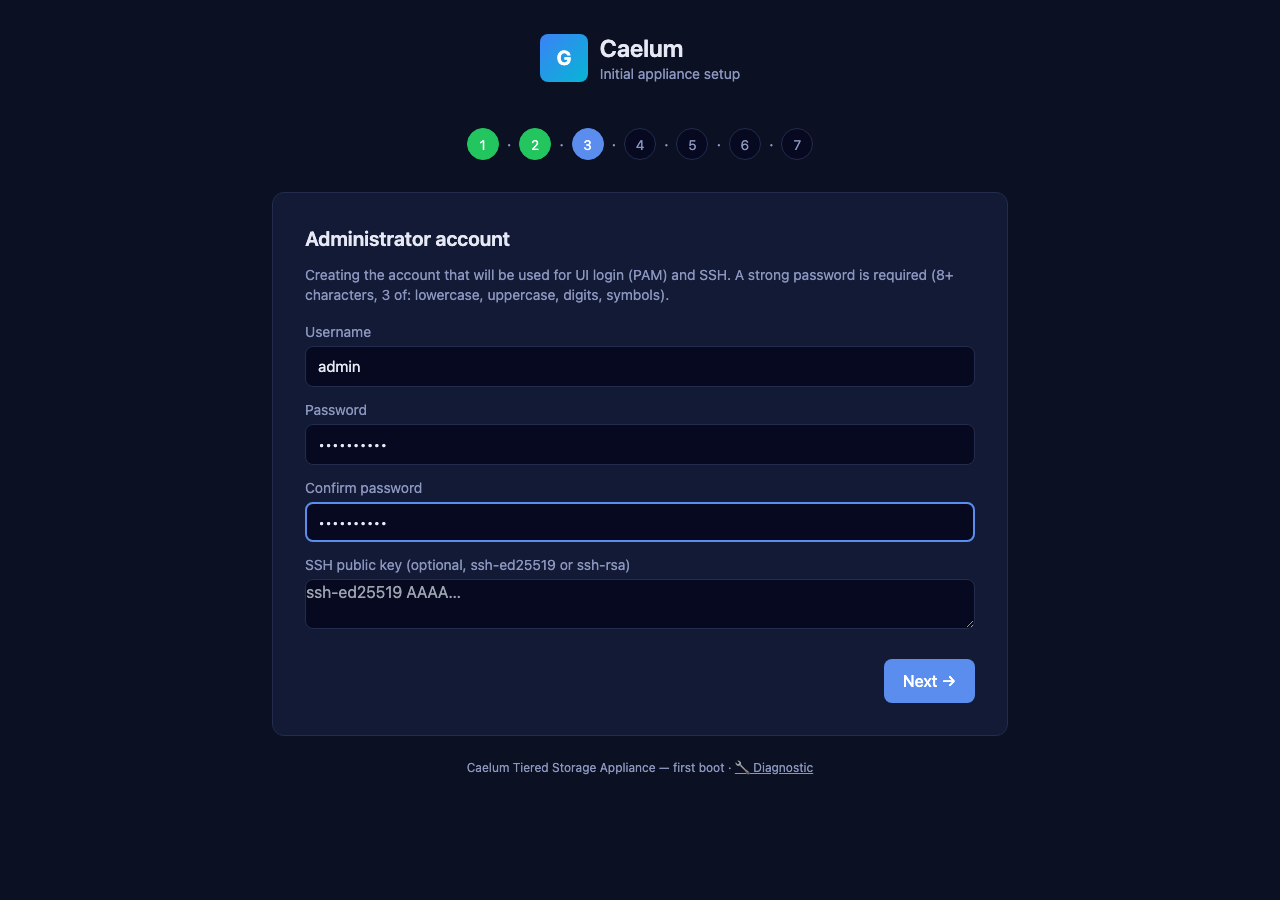
B.3 — Administrator account (step 3/7)#
Create the local administrator account (login + password). The root
account will be locked at the end of the configuration.
B.4 — Storage (step 4/7)#
Select the data disk(s) to include in the storage pool and choose the topology (single disk, mirror, RAID-Z…). Do not select the OS disk. Click Create pool.
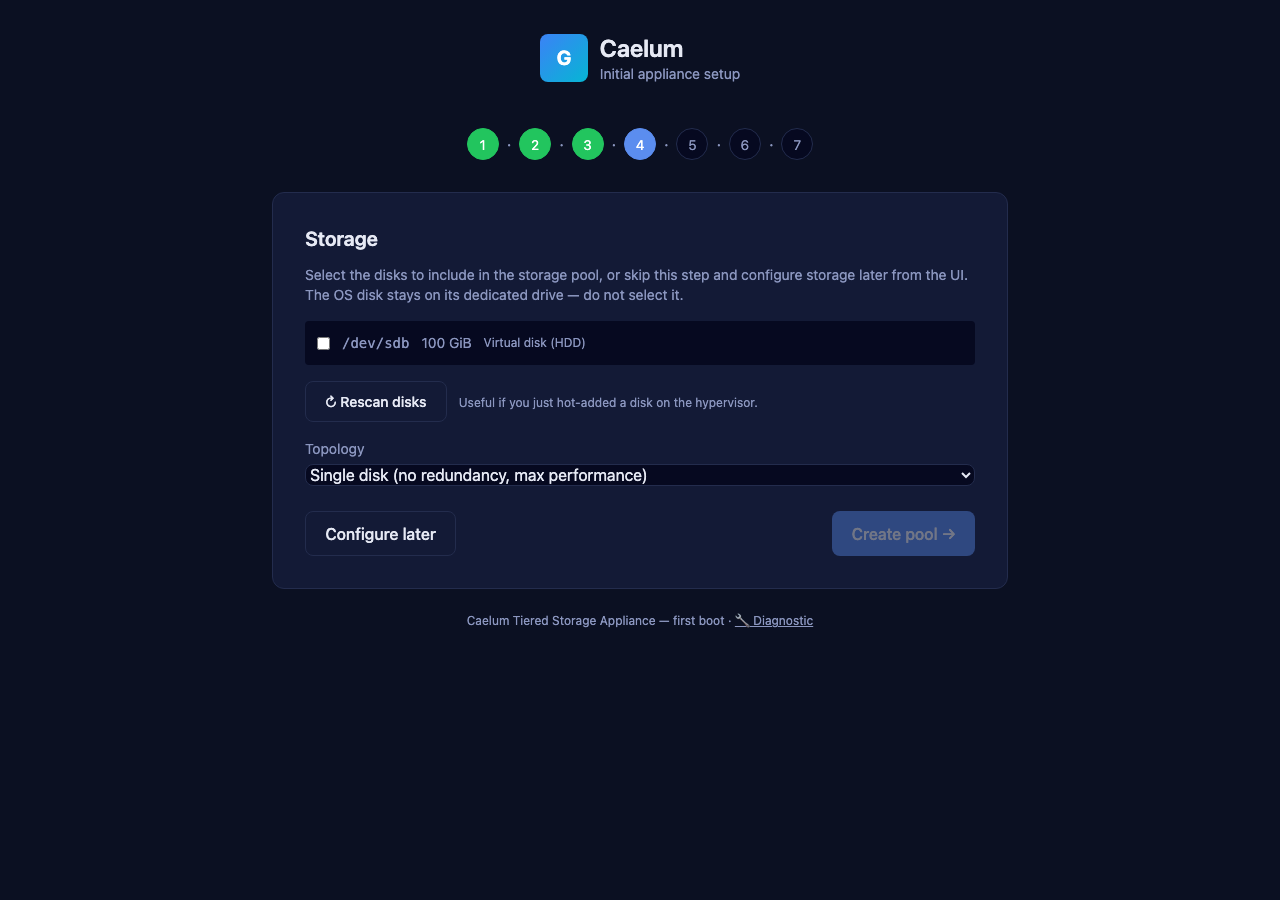
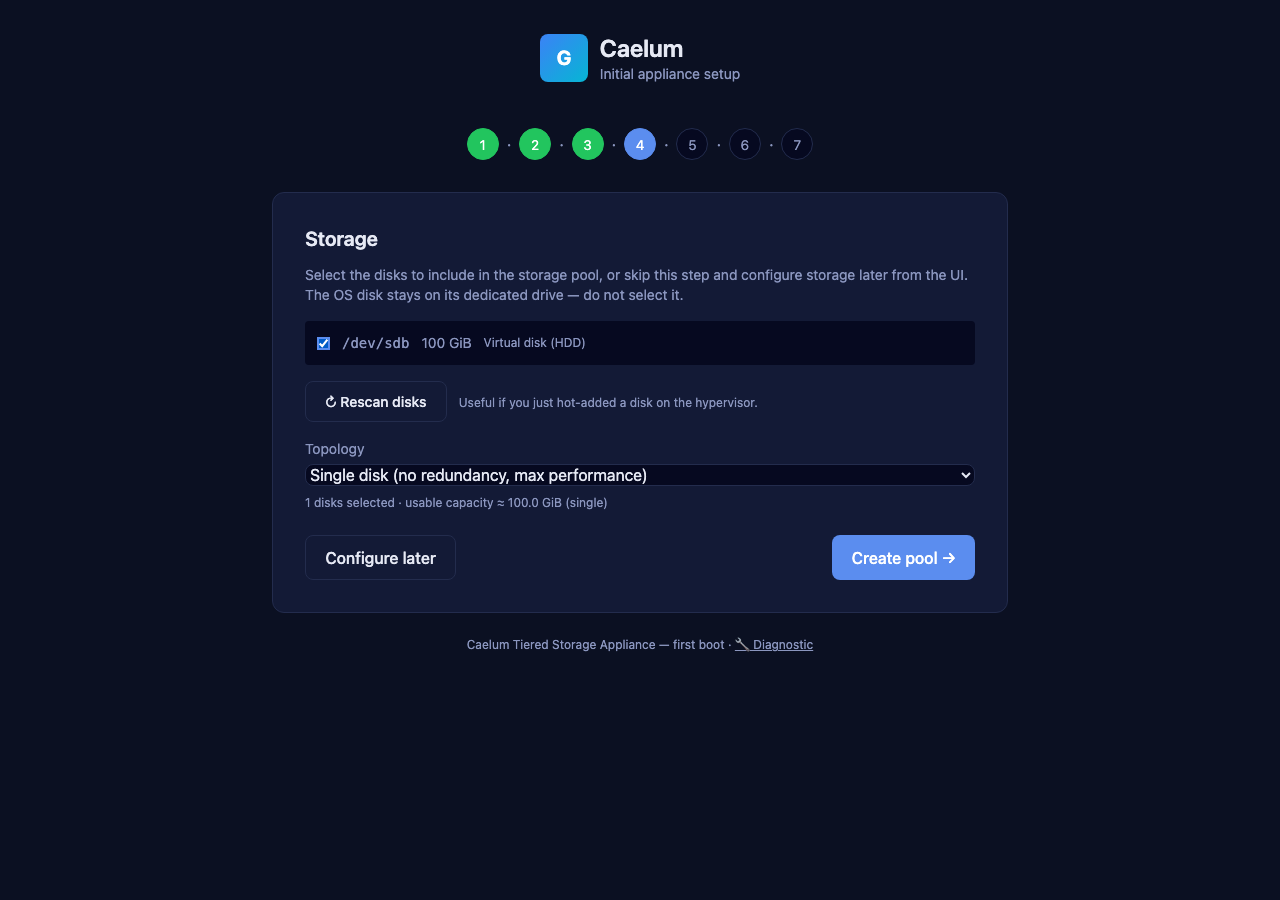
If no disk appears, check that a data disk is properly attached on the hypervisor side then click Rescan disks. A disk already carrying a signature (old pool/filesystem) must be erased before use.
B.5 — Active Directory (step 5/7)#
Join an Active Directory domain, or click Skip to configure access later.
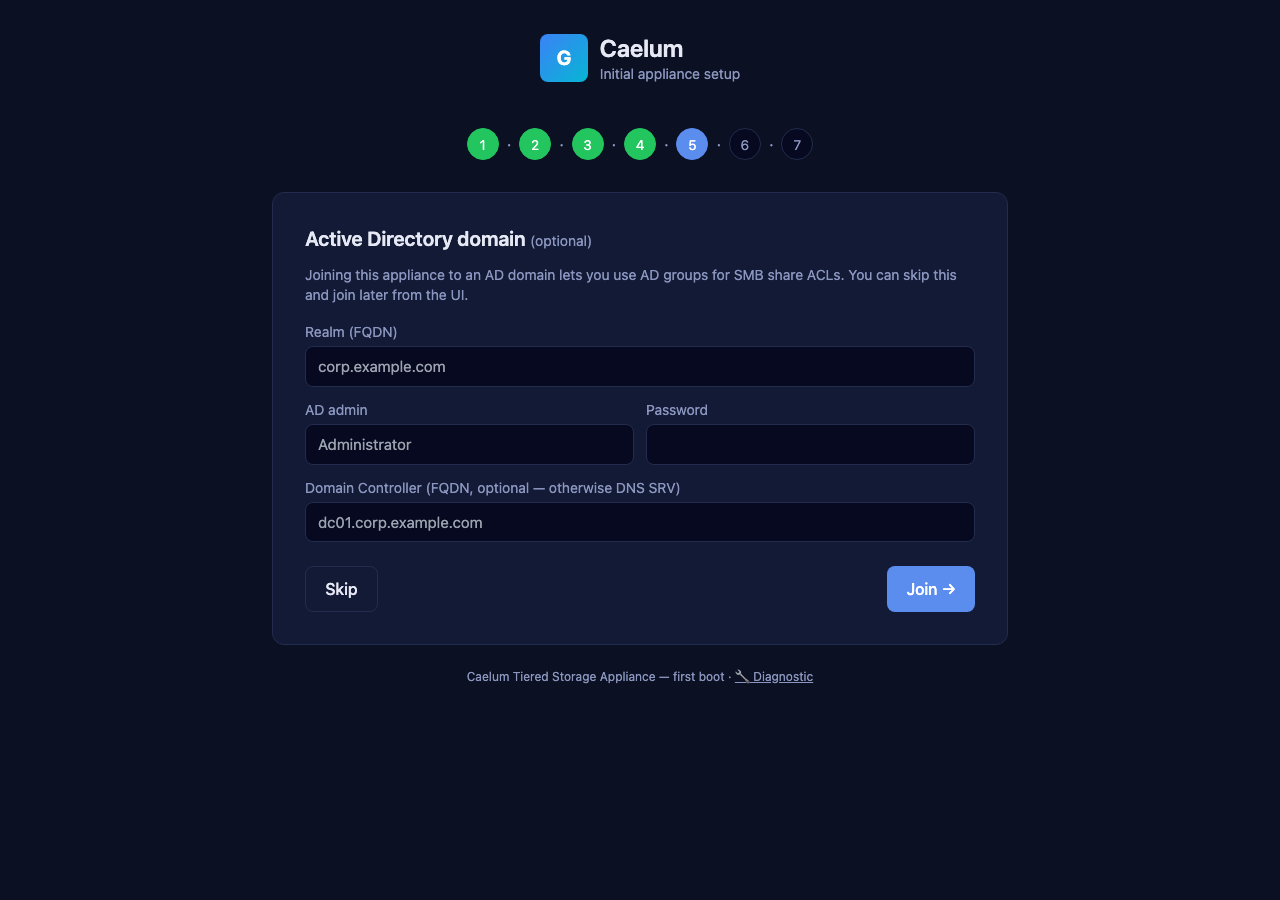
B.6 — Telemetry (step 6/7)#
Anonymous and optional telemetry (no file names, no user data). Enable it or click No thanks.
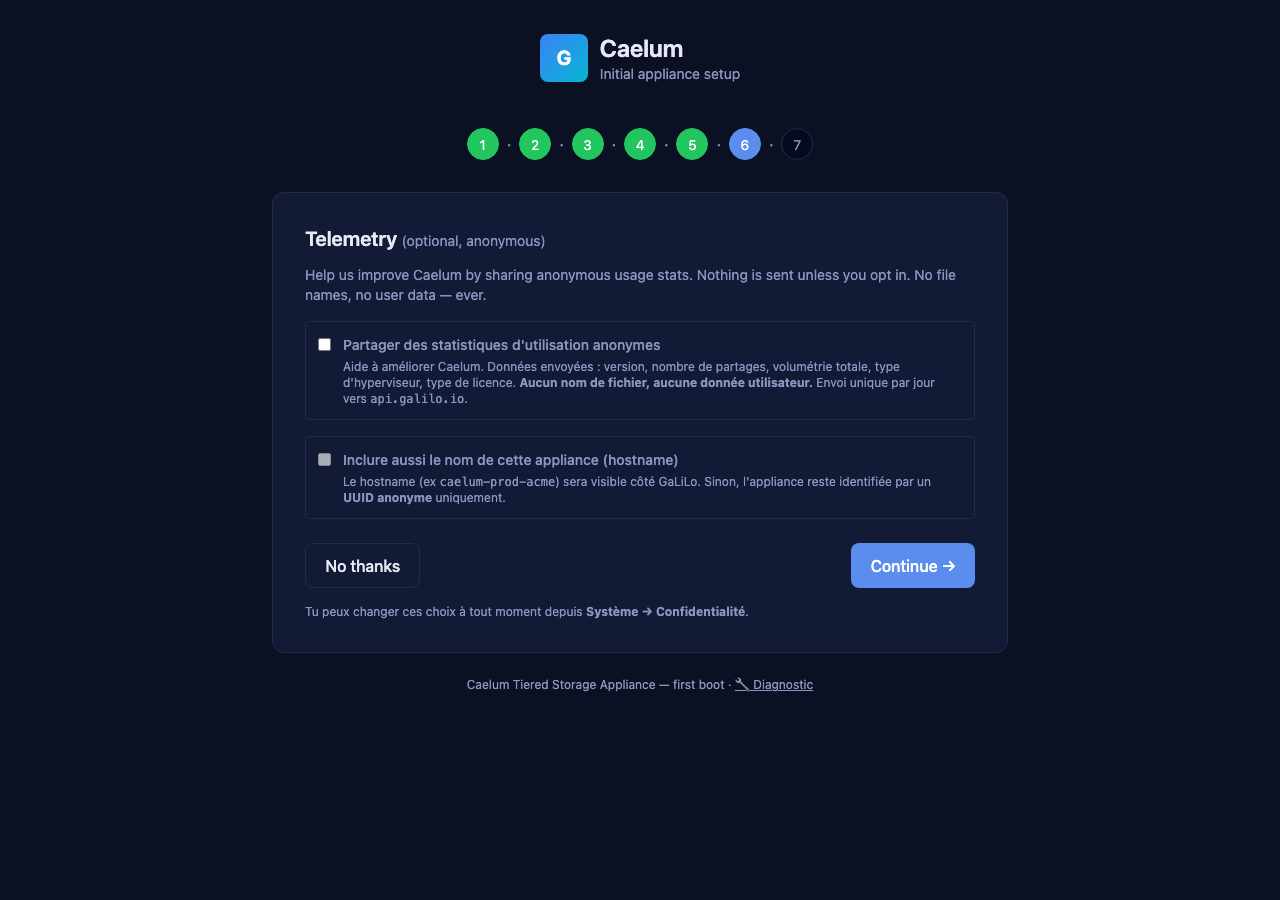
B.7 — Review (step 7/7)#
Review the entire configuration and finalize.
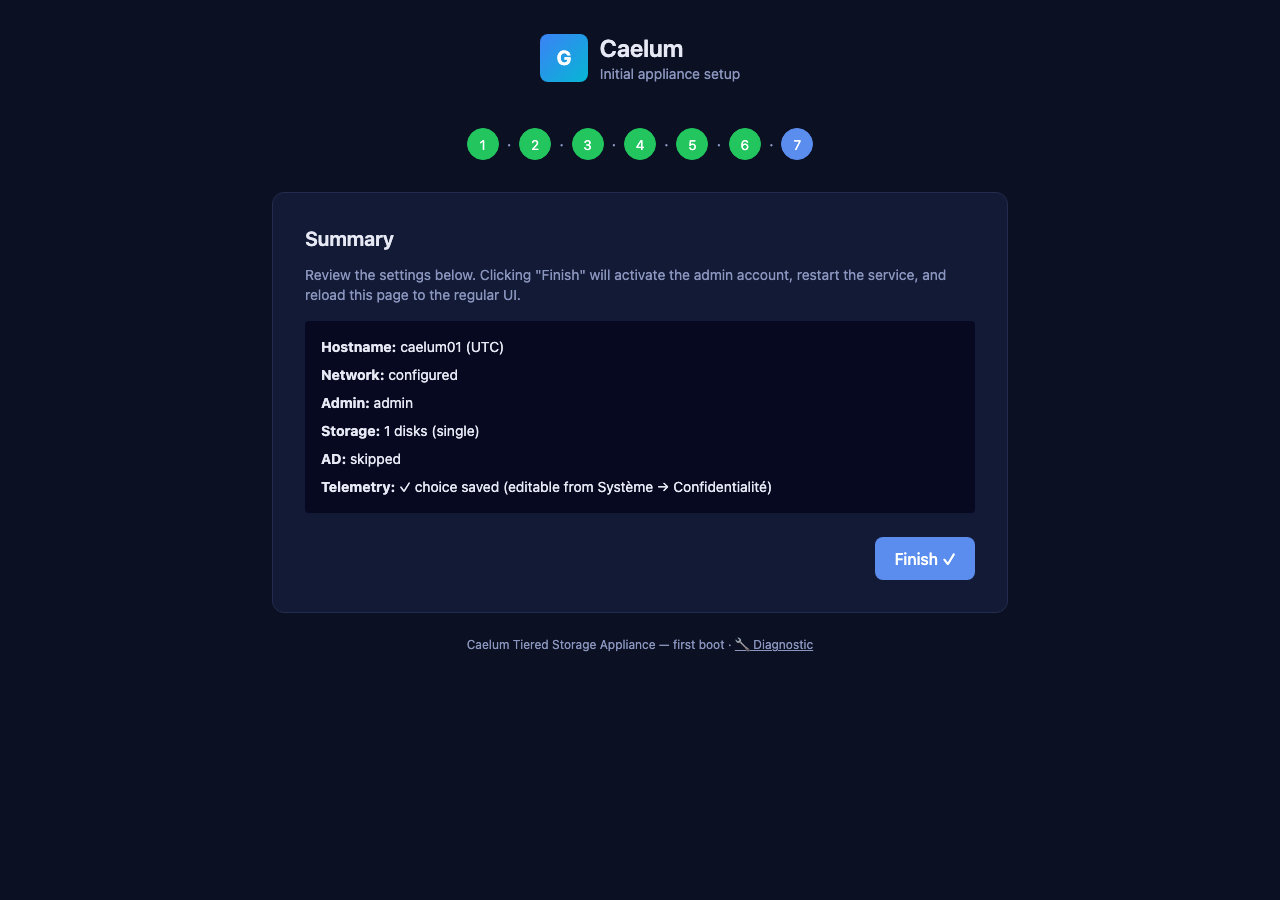
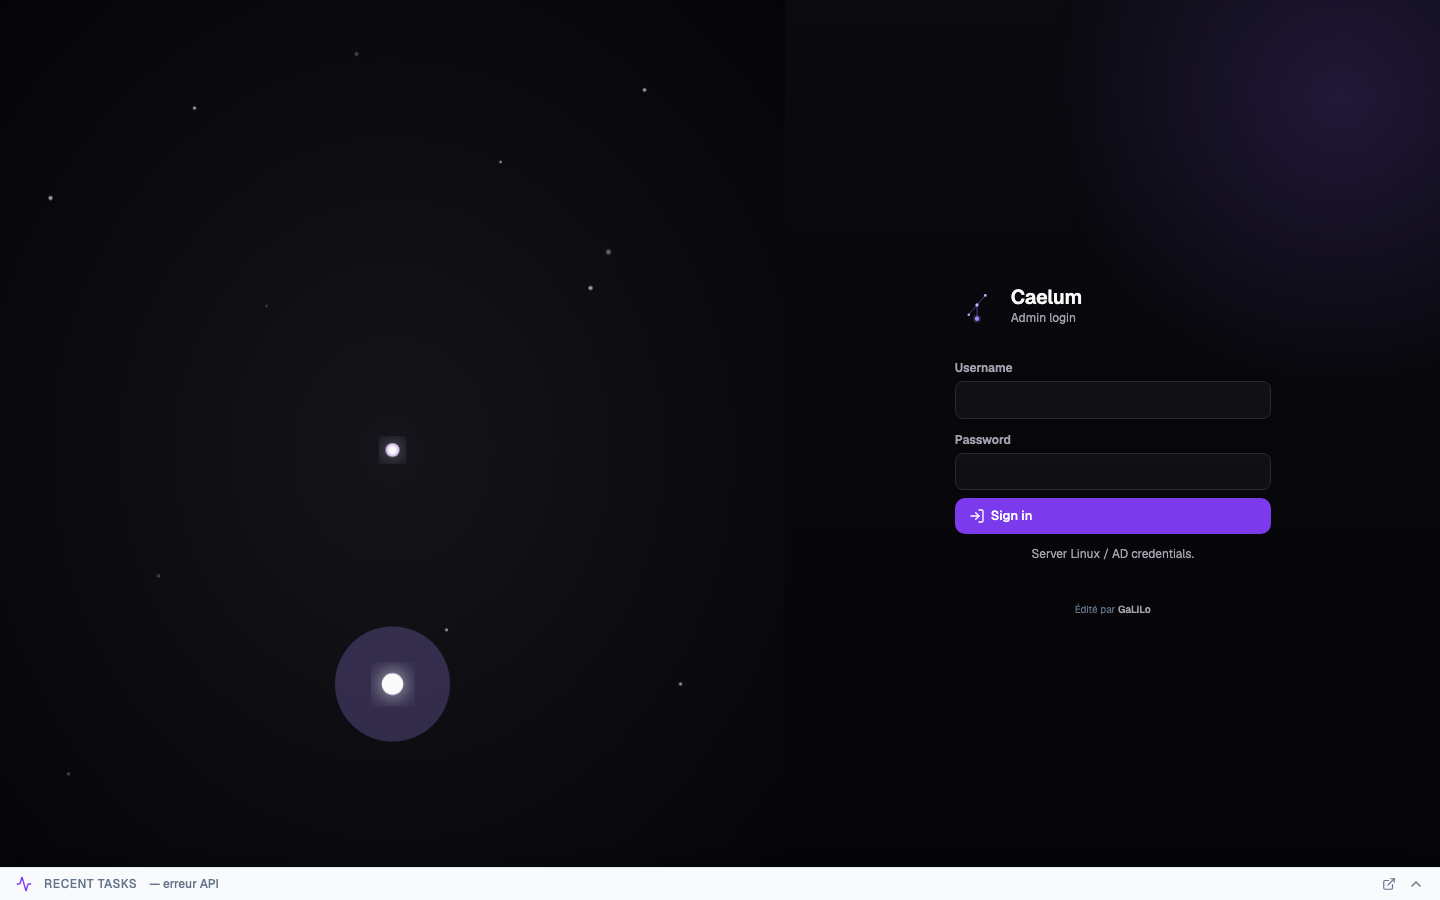
B.8 — Login#
Configuration is complete: the root account is locked and the interface
switches to the login screen. Sign in with the administrator account
created in step B.3.
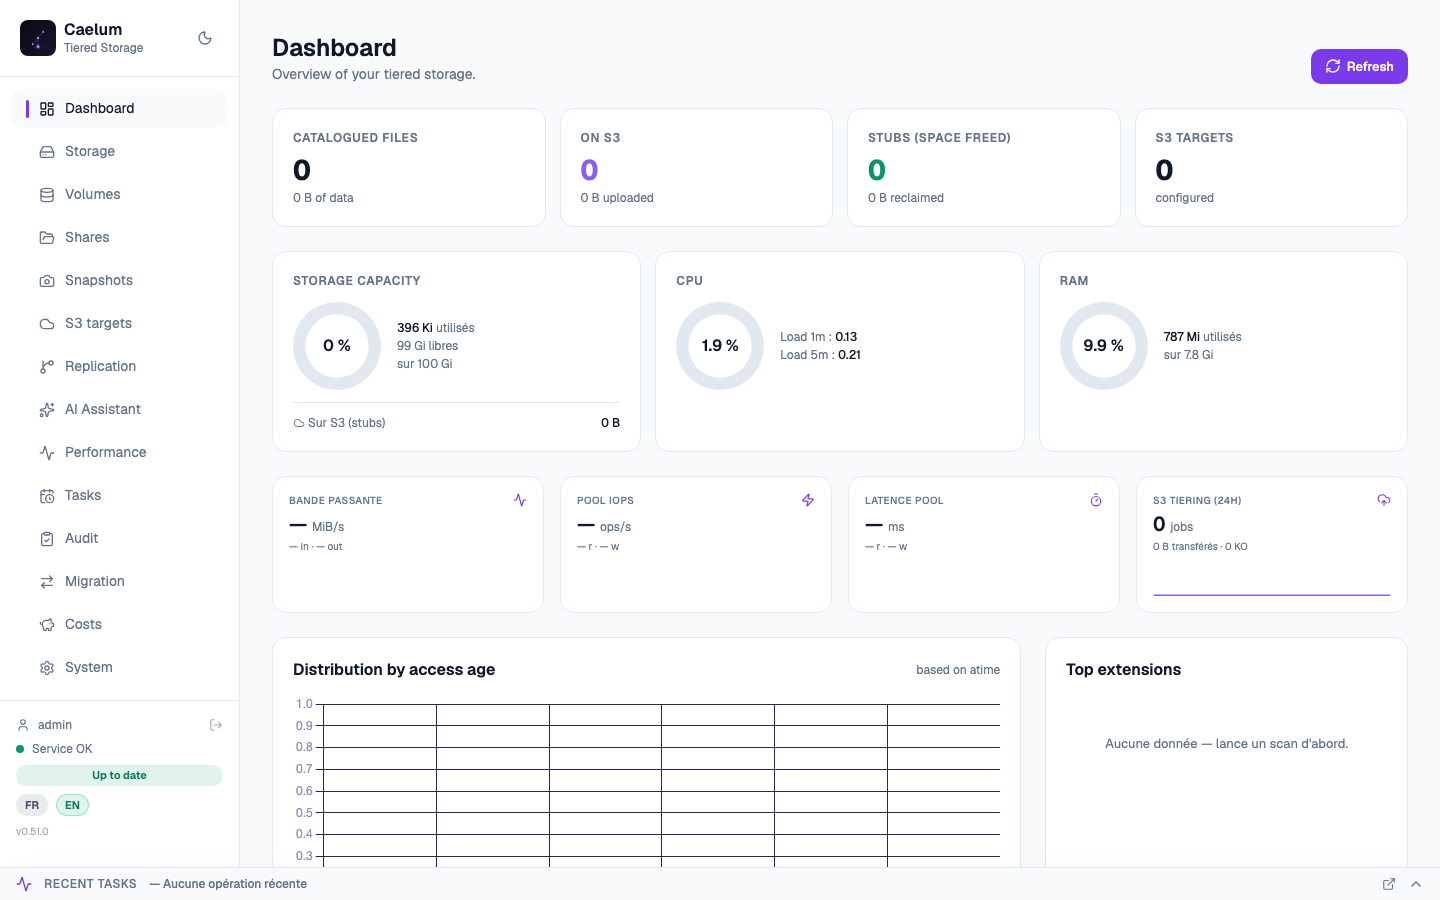
B.9 — Dashboard#
You reach the Caelum dashboard: pool capacity, CPU/RAM, bandwidth, IOPS, S3 tiering. The appliance is operational — you can create shares, configure cloud destinations, schedule snapshots, etc.
What's next?#
- SMB/NFS shares: Shares menu.
- Cloud archiving (S3): Cloud destinations + Archive policies.
- Snapshots & replication: Snapshots / Replication.
- Updates: System → Updates (one-click via the support account, or from a file in an air-gapped environment).
- Day-to-day administration: see the administration guide.
Troubleshooting#
On reboot: "Operating System not found" or switch to PXE / network boot. The VM tried to boot an empty disk. Common causes:
- The ISO is still mounted and the VM rebooted from it, or the boot order points to an empty disk → detach the ISO and put the OS disk first in the boot order.
- Install done on the wrong disk (multi-disk VM) → reinstall on the disk that the firmware boots from, or leave only a single disk during install.
The install is "instant" (a few seconds). Abnormal: a real image write takes 1-3 min ("Written: … GB" counter). If it is instant, the media is probably corrupted — re-download the ISO and verify the SHA-256 before trying again.
The ISO does not boot in UEFI. Switch the installation media back to BIOS / Legacy firmware (safe recommended path). On Hyper-V, create a Generation 1 VM. The installed appliance then works either way, in BIOS as well as in UEFI.
The VM stops at an EFI "Boot Manager". Select "Boot normally" (Enter). If it falls into "unsuccessful", switch the VM back to BIOS/Legacy.
Storage step: "No free disk detected" although a disk exists. The disk carries a residual signature (old pool/filesystem from a recycled disk). Erase it on the hypervisor side, or from the console (double-check the device — destructive operation), then Rescan disks:
# If an old pool is auto-imported, destroy it first
sudo zpool destroy <name>
# Then erase the disk's residual signatures
sudo wipefs -a /dev/sdX && sudo sgdisk --zap-all /dev/sdX
After changing the IP in the wizard, "site inaccessible". The appliance
switched to the new IP: reconnect at https://<new-ip>/setup.
Certificate warning in the browser. Normal: the certificate is self-signed by default. Accept the exception, or import your own certificate (System → TLS Certificate menu).
Need a static IP without DHCP. Log in to the console as
galilo-debug (password shown on the banner) and run:
sudo galilo-set-ip
ISO installation guide (installation in BIOS / Legacy, dedicated OS disk + at least one data disk for the pool).